Composting for the lazy.
I've created this page to put occassional hints, tips and techniques about allotmenteering ( I think I just made that word up!!)
The first tip inevitably has to be about composting. A subject so close to my heart that I've been told I would sleep in the compost bin given the chance - in fact my wife has suggested it on numerous occassions.
Compost bins are availalable in many shapes and sizes but if you have the time and the space why not construct your own.
"Experts" say you can create your own perfect compost in as little as six months ............ RUBBISH (Well, more compost than rubbish)..
You might come fairly close if you use precisely the right amount of materials in two inch alternating layers, nicely shredded,and turn the whole heap upside down once a week; and keep the moisture content consistently at exactly what woodlice and other creepy crawlies thrive in. Me, I can't be bothered.
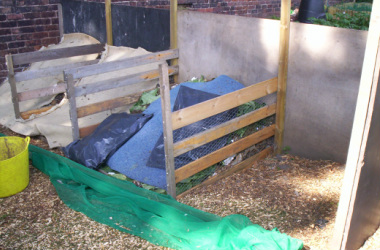
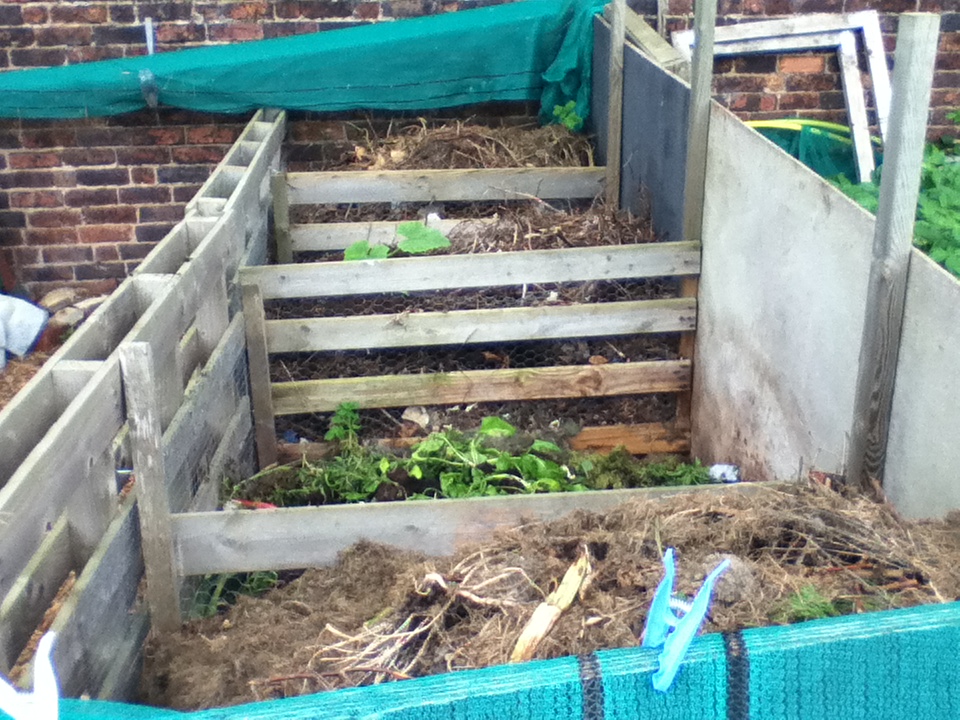
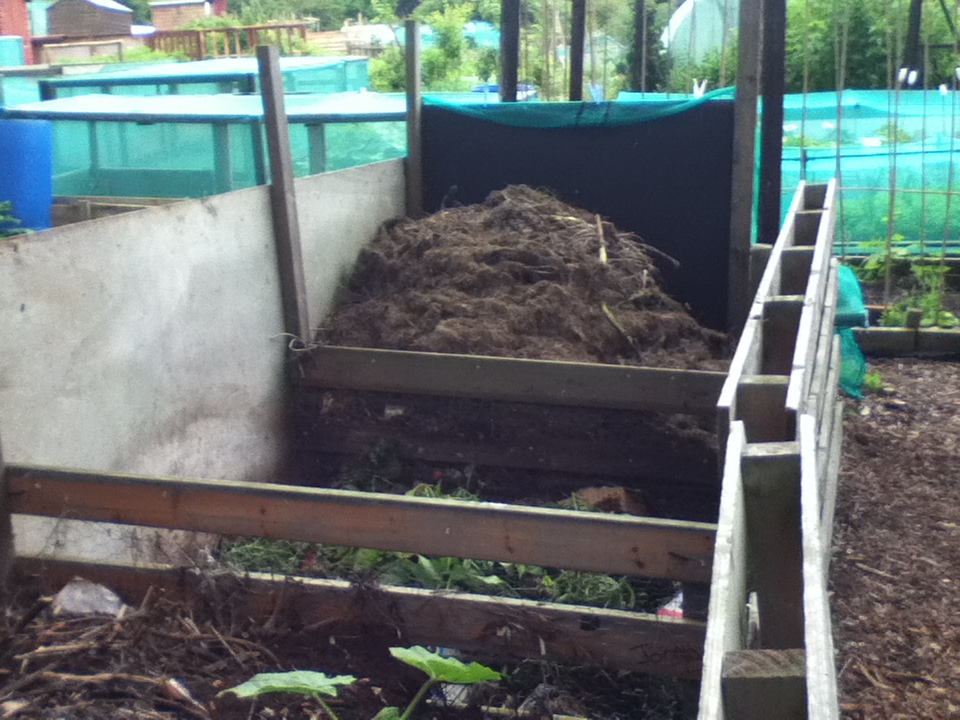
The picture above shows my compost area; consisting, effectively, of four separate "bins" side by side. Each "bin" is more or less a four foot cube. They have a solid MDF board at the back and wooden strips 4" apart between them, creating four compartments.
They are placed on just bare earth to allow worms etc. easy access.
The first tip inevitably has to be about composting. A subject so close to my heart that I've been told I would sleep in the compost bin given the chance - in fact my wife has suggested it on numerous occassions.
Compost bins are availalable in many shapes and sizes but if you have the time and the space why not construct your own.
"Experts" say you can create your own perfect compost in as little as six months ............ RUBBISH (Well, more compost than rubbish)..
You might come fairly close if you use precisely the right amount of materials in two inch alternating layers, nicely shredded,and turn the whole heap upside down once a week; and keep the moisture content consistently at exactly what woodlice and other creepy crawlies thrive in. Me, I can't be bothered.
The picture above shows my compost area; consisting, effectively, of four separate "bins" side by side. Each "bin" is more or less a four foot cube. They have a solid MDF board at the back and wooden strips 4" apart between them, creating four compartments.
They are placed on just bare earth to allow worms etc. easy access.
Now comes the lazy bit.
I started, obviously, with four empty "bins". For the first few weeks of working down the allotment everything that is compostable went into the first bin: grass cuttings, bits of pruning, kitchen compost, cardboard, junk mail, shredded paper, dead shrubs and other plants.
Once the pile of rubbish reached the very top of the board at the back of the first bin I started filling the fourth bin - ie. I used either end first and left the two in the middle empty. My genius sometimes frightens even me!!
After a month the first bin had shrunk down to about two-thirds its original size as composting takes place.
I carried on filling the fourth compartment and when that was full I returned to the first one. Using a fork (a GARDEN fork, idiot) I emptied the first bin into the second bin so that it was now effectively upside down. It was also about half its original size. I then continued bringing compostable materials down to the allotment, placing them in the now empty first bin. Once this one was full I moved the contents of the fourth bin into the third bin and then used what was now my only empty and available compartment.
All this took over a year and by the time the fourth and final bin was full almost eighteen months had elapsed - and still no compost you say.
By this time the two central compartments had reduced in size quite considerably so I forked the contents of one into the other, leaving me with another empty bin to use........ and here is the genius bit. By the time this final compartment was full, the contents of the first combined two had evolved into excellent usable compost; and all with only three back-breaking turnings - as opposed to about twenty the experts recommend.
YES, I KNOW IT TOOK TWO YEARS.............. but the point is, by being patient and using a bit of forethought I now have a continuous supply of compost with very little physical effort. You just have to keep on top of the order in which you use, and make available, the four compartments. The compost I am using is always about two years old, though I do have to do a little sifting to remove larger pieces of shrubbery or branches and I have found that you can throw whole Domino's Pizza boxes on the pile and they too will miraculously decompose, thanks to out little eight legged friends ( and no-legged friends!)
Next week............ making use of your wifes old shoes and undergarments. Oh, sorry! That's my other website.
Too many lettuce at once?

You can't wait to pick your first lettuce and they've all grown at once (serves you right for planting them all at the same time). So what can you do?
When you have too many maturing at once pick them very carefully, root, soil and all and lay them in a shady place for an hour or two. Then replant them. This gives them a shock and will slow them down for 5 to 7 days thus giving you time to catch up. The flavour and quality will not suffer but make sure to water them in well.
When you have too many maturing at once pick them very carefully, root, soil and all and lay them in a shady place for an hour or two. Then replant them. This gives them a shock and will slow them down for 5 to 7 days thus giving you time to catch up. The flavour and quality will not suffer but make sure to water them in well.
Deter birds from eating your strawberries.
No idea if this works (almost sounds like a tip from VIZ).
Paint a few stones red and lay them just outside your netting. Make sure that in size and shape they resemble strawberries. Birds will swoop down to peck them and get a real shock instead of a treat. Soon they'll give up and leave your luscious fruits alone.
Paint a few stones red and lay them just outside your netting. Make sure that in size and shape they resemble strawberries. Birds will swoop down to peck them and get a real shock instead of a treat. Soon they'll give up and leave your luscious fruits alone.
Keep cats off your plot.

Over winter on allotment sites where humans are rarely about cats will happily establish their patch so it is a good time to deter them.
Save your urine and spray it around. Do this every 2 or 3 weeks and in spring you will not have a cat problem.( If there is heavy rain do it again as soon as possible) - - - if you do it over the cat it's even more effective (that last bit is a joke....... before animal lovers leave nasty messages).
If you do not want to do this then scatter Tea Bags on which you have placed a drop of Olbas Oil. The smell will make them feel a lot less welcome. Replace around once per week, or after very heavy rain.
If cats have already established a toilet they will re-use it as a message to other cats. If you have some bramble or rose cuttings, lay them over the spot and the cat will find somewhere else.
Midges in water butts

Water butts can and do attract midges and some mosquitoes. To avoid this happening float some olive oil on the top. Just enough to cover the surface with a very thin coating. After a week or two skim it off and replace with fresh oil. It may look a mess but it will not affect the water quality and it will stop them from laying any eggs.
Before you treat your water butt, remove anything floating on the top.
If you have a water butt with a lid from which you draw off water from a tap in the bottom, then midges will lay eggs if they can gain access. They will breed in their hundreds if not thousands and become a nuisance when they start to bite. If you have a tight well sealed lid that will stop them but most butts are just not that tight. Normally a water butt only requires that you start off with a clean interior and that you draw off the water regularly to stop it becoming stagnant.
The only reason for using olive oil instead of the cheaper oils is that olive oil will not separate allowing minute particles to sink down into the water below. It also lasts longer without going rancid. Otherwise any oil does form a barrier and that's what it's all about.
Sowing parsnip seeds
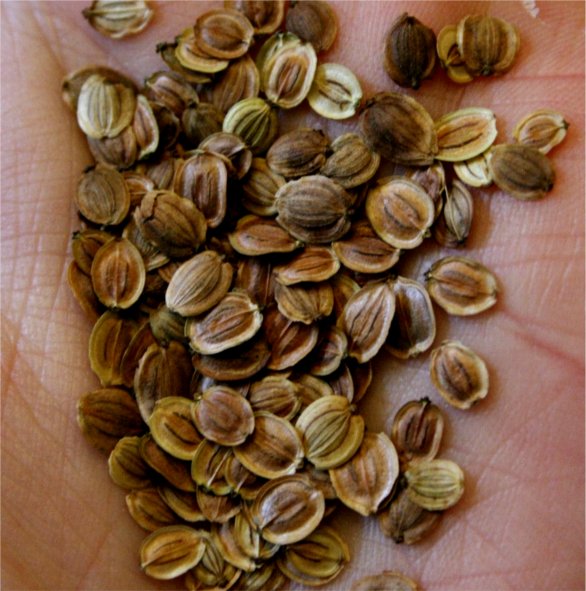
Spring is a good time to sow parsnips. They can be tricky to grow, but there are a few cunning dodges that you can use.
Prepare a shallow drill in the soil, about 20mm deep, and sow three or four seeds every 10-12cm - that way, if one or two fail to germinate, you won't have any empty spaces along the row.
Germination takes up to a month, and it's a good idea to sow a quick-growing crop like lettuce or radishes in among the parsnip seeds. This is not only a good use of space, but helps to mark out where your parsnips are coming up.
Crop rotation
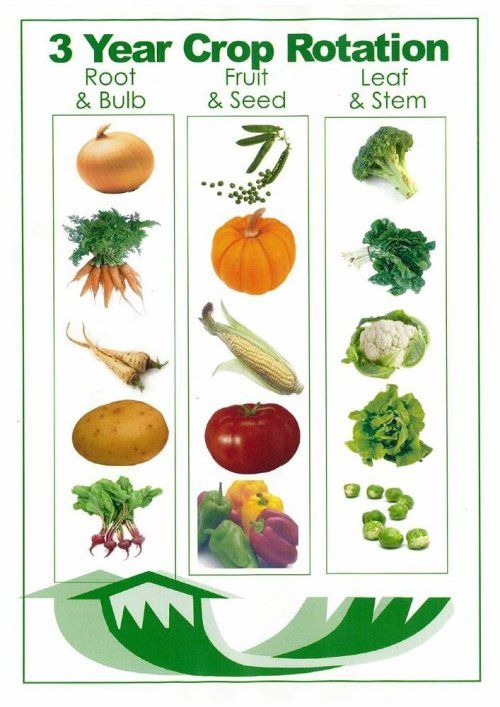
There are dozens of books on the subject so I won't cover it at length: basically, growing the same root crop in the same place every year depletes the soil, and allows a build-up of the pathogens relevant to that crop. This is particularly disastrous for potatoes and for tomatoes, but to some extent it affects all root crops.
So it's best to get into the habit of crop rotation, right from the start. The target is to have a three-year cycle, so you will need at least three beds. Grow, for example, spuds in one, carrots, runner beans and french beans in the second, and courgettes, lettuce and tomato in the third. Next year, they all move round one bed. You don't have to fill any one bed before you start another one: and you can of course have 6 beds, or 9 beds, or however many you like. I have yet to hear someone complain of having too much room in their allotment......
As well as these rotating beds you will have permanent beds for the permanent crops such as asparagus, if you are that way inclined, and soft fruit such as rhubarb, raspberries, currants and so on which don't need to be moved every year.
Pumpkins and squashes
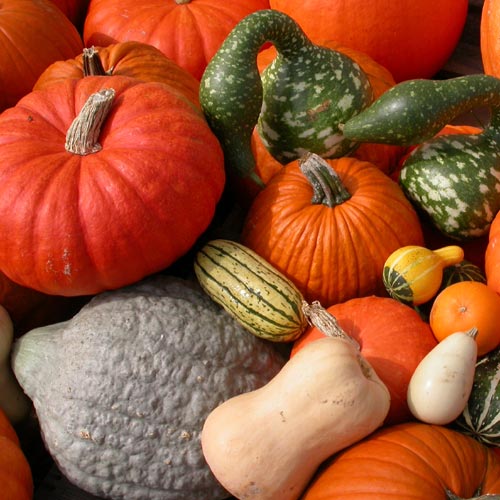
Traditionally raised from seed indoors, then gradually harden off and transplant into bigger pots as they grow, they should be ready for planting out by late May after the last frosts. - Can be planted out with similar cucurbits in patches or with their native American companions of beans and sweet corn.
If planting a pumpkin or squash patch it is advisable to plant through weed suppressant fabric as the bare soil beneath the growing plants and foliage often becomes inhabited by unwanted flora, which can obviously itself set seed and become difficult to eliminate.
When planting out, dig a large hole, add some fertiliser of some description (organic chicken manure pellets or compost) to the bottom of the hole. Then add your plant and cover its roots with soil, making sure the height it is planted at is lower than the surrounding soil, so as to make a trough to preserve and catch water.
Be aware of where it grows, train into areas where it is not going to smother or stifle the growth of other plants and nip out the tips of its stalks when it has gone as far as it can go.
The efficient use of space is everything when you are planning to have a large part of your plot or garden dedicated to pumpkins and squashes. As obviously you don't want fallow ground wasted, hanging about waiting for your plants to go in and cover it, but also you do not want to provide them with not enough space to expand. The way us lottieblogers deal with this is that we dedicate a small area to house a central ring of plants in early summer. This area is skirted by other crops which will be out of the way by the time the pumpkins are in full swing (in our case early potatoes on one side and onions from sets on the other) and so the soil will be free for them to ramble over at their leisure. Of course there are other options such as catch cropping to deal with this issue
When the plants begin to produce flowers ensure that male flowers manage to spread their pollen, this is normally done for you by the local insect life but a cotton bud and a bit of patience can be just as good. - Use markers or coloured cloth to show where the root balls of pumpkin and squash plants are as they become more established, to help prevent time being lost trying to locate the actual plant in amongst all its extremities for feeding or watering purposes.
Eventually, some of the female flowers develop a bulbous base which should set into a fruit, remember however until they establish and start swelling profusely they are not guaranteed not to rot off and die. To help avoid this consider their position, if they are in a divot and likely to be sitting in water, place something to lift them out of the divot beneath them. Be careful not to damage them when moving around your patch or inspecting them and finally, keep them clear of any stalks or foliage from the plant or its nearby companions which might grow over or around them and restrict its growth or cause damage.
In autumn it is likely that your plants will suffer from powdery mildew, a common pumpkin problem, personified by powdery white deposits forming on its leaves. You'll be happy to know this should not effect your crop or fruits in any way and requires no treatment, all we do is remove the worst effected leaves for aesthetic reasons.
As October turns the corner you should be ready to harvest, cut the stems with shears leaving as little of the stem on the fruit as possible.
Pumpkins and squashes need ripening before they can be stored for long periods, a week or so on a warm sunny window ledge or in a greenhouse should do the trick and harden off their skins nicely. However rotting is an ever present danger and should be checked for regularly, wipe off any mould which appears on stalks, give them a good prodding to ensure they haven't gone soft and keep an eye on any damage, discolouring or indentations to the skin.
Save seeds from your fruits for next year as you use them, although many are hybrids and so the future plants may revert to type somewhat and provide you with some unexpected results at the end of next season. - Pumpkin keeps well in the freezer, skin and cut into chunks for this purpose or turn into soup and freeze as a liquid.
.
Beetroot
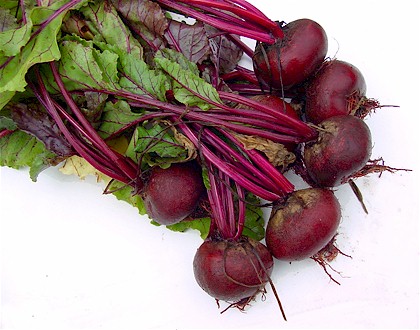
Sow in springtime in Drills, cover initially to deter pests.
Beetroots are reasonably quick maturing and as such so sow sucessionally and once a patch has been cleared by harvesting it is will be well worth while to stick a few more seeds in to grow, even if it towards the end of the growing season as you'll reap a small but welcome later harvest.
Once your seeds have sprouted and are about an inch high, thin them to one every 5 cms or so to prevent overcrowding as they grow. This is quite inevitable if thinning is not undertaken, as most beetroot that you sow are in fact a small husk containing a number of seeds. Due to a high germination rate a patch can get very untidy and in the long run unproductive housing more roots than is beneficial.
The thinning are delicious used in salads in their own right.
Water and weed regularly during the growing season and keep thinning should overcrowding of crops continue.
Be aware for any root splitting or damage. Beetroot is a favourite of mice and other rodents so keep an eye out for any large gouges, damage or nibble marks.
Harvest when the roots are big enough to be of use, this is often a very personal thing and dependent on the variety you have grown. Some like baby beets, others like them big for boiling at eating unpicked, whereas some long varieties can be left for longer periods to create a greater yield for pickling.
Simply pull the roots from the ground using their tops, taking care not to disturb any nearby but still growing neighbours it may have.
When removing the leaves from the bulb after harvesting, do not cut with a knife as this will increase the risk of bleeding, simply tear off the tops as close to the root as possible, you'll get a bit of a messy hand but in the long run its better.
Wash and boil your roots, after which you should remove the skins, slice and place in jars of vinegar should you wish to pickle them, or keep in a sealed container in the fridge for other uses. Unfortunately we cant really comment on the best way to store raw, harvested roots as they never seem to hang around without being processed long enough for us to take note.
Rhubarb
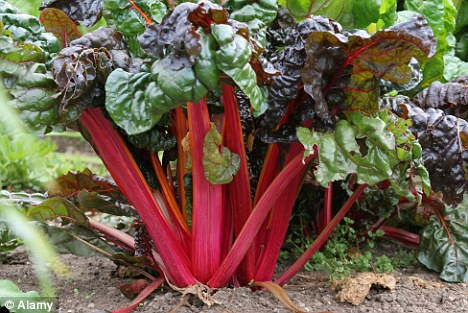
Do not pull any stems for the first 12 months after
planting or dividing tubers. Remove dead & decaying leaves
during the autumn. Add top dressing of manure or compost to rot down over the winter and protect the roots beneath.
In winter you can dig up your tubers, divide them if necessary to remove any diseased or old material and re- plant so that their crowns are just below the surface of the soil.
Take care not to allow your patch to become overcrowded.
When fruiting, do not begin pulling leaves until there is a good crown of them.
When pulling, put your hand as far down the stem as it will go and pull directly towards yourself in a sharp firm motion, to remove the whole stem and not leave a broken portion at its base.
Rhubarb leaves are poisonous and not that suitable for the compost heap, although they can be steeped in water and left for a season to create a very stinky but effective & organic pest repellent. Or placed in their own compost pile and a regular handful of garden lime thrown over them to neutralise some of the acidity.
The fruit can be stored in a variety of ways and keep you in puddings for many months. The simplest way we have found is to cook it in chunks, briefly with a small amount of water until tender, place in sealable plastic boxes and when cool put in the freezer. You can then defrost exactly however much you need, whenever you require it.
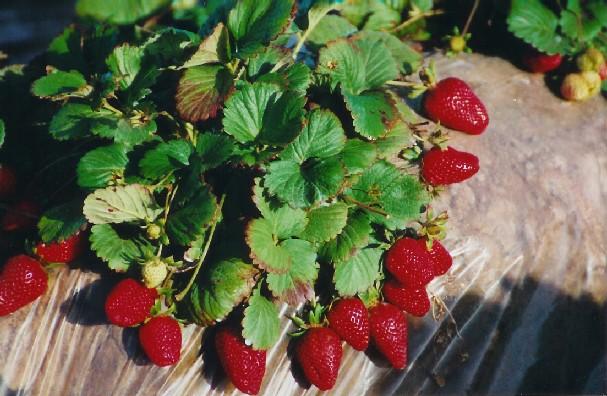
Strawberries
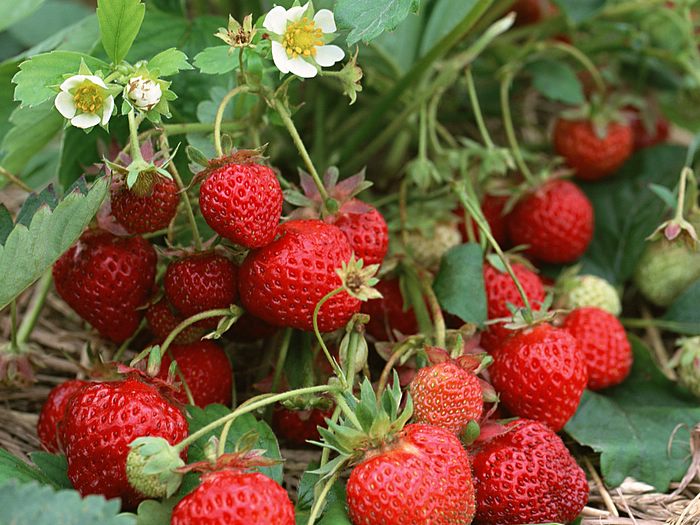
Plant or relocate into position in early spring or late summer.
Use manure or potash feeds to strengthen the plants after planting.
Strawberries can fruit from their first year onwards, however after the 3rd year it is often good practice to replace your plants as they will be past their fruiting best.
Use straw or shredded paper beneath the plants to cushion the fruit as it forms and prevent them spoiling on the soil.
Beware of slugs and four legged pests which will happily come and munch away at your ripe fruit, all to often have we picked up what looks to be a perfect and ripe specimen to find that the other half of it is missing. Slug traps, bran and egg shells can be useful organic weapons.
Runners which are a natural reproduction process of strawberry plants can be trained into pots (after the plant has fruited so as not to interfere with cropping - any which arrive beforehand should be removed) and eventually separated from their parent to form new replacement plants.
Although training runners is a good cheap way of replacing plants remember it is good garden husbandry to regularly replace or top up your fruit patch with new disease resistant stock.
After fruiting trim all leaves back down to the crown (if you do not want to wait for runners to form) to encourage new leaf formation and for the plant to invest in itself for next season.
It is inadvisable to put the leaves of strawberries on the compost heap as they can harbour disease, burn or bin them instead.
Goji Berry

In 2013 we decided to grow a Goji Berry in a pot. This is what NHS choices has to say about them.
Popular among celebs from Madonna to Mischa Barton, goji berries have been used in Chinese medicine for more than 6,000 years.
These shrivelled red berries are alleged to boost the immune system and brain activity, protect against heart disease and cancer, and improve life expectancy.
We've teamed up with the British Dietetic Association (BDA) to examine whether the health claims about goji berries are supported by the evidence.
Goji berries contain vitamin C, vitamin B2, vitamin A, iron, selenium and other antioxidants (notably polysaccharides)
The evidence Immunity, cardiovascular disease and life expectancy
There is no reliable evidence to support these alleged health benefits. Most of the research into these conditions are small-sized, of poor quality, and performed in laboratories using purified and highly concentrated extracts of the goji berry.
Wellbeing, brain activity and digestion
One small study from 2008 found that a daily drink of 120ml of goji berry juice for 14 days improved feelings of wellbeing, brain activity and digestion. However, the study involved only 34 people and was attempting to measure the effects of goji berry juice on a variety of conditions. The results of the study were inconclusive.
Cancer
One of the most talked about clinical studies on goji berries is a 1994 Chinese study conducted on 79 patients with various advanced cancers. It found that those treated with immunotherapy in combination with goji polysaccharides saw their cancers regress. Unfortunately, information on the design of the study and the goji berry compounds used are lacking, so it is difficult to fully assess the significance of the results.
The dietitian's verdict Alison Hornby, a dietitian and BDA spokesperson, says the evidence behind the health claims about goji berries is weak.
She says: "Various goji berry products are sold as health foods, but the evidence of their health benefits so far comes from scientific studies using purified extracts of the fruit at much higher concentrations than the products contain.
"As these products tend to be relatively costly, it makes sense to stick to eating a range of fruits and vegetables rather than spending your money on this one item with no proven health benefits."
Footnote:-
As of May 2020 we are still awaiting our first Goji berries and, currently, the Goji Berry is looking VERY sorry for itself.
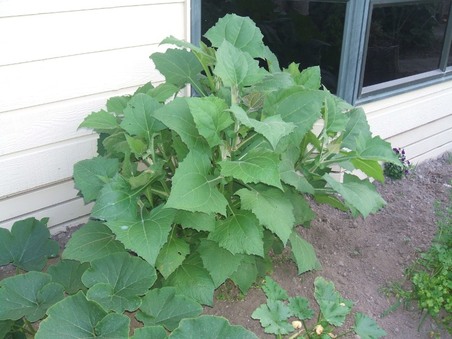
Yacon plant.
In 2014 we planted a Yacon plant.
(NOTE:- We dug the Yacon up in 2017 without actually ever sampling it. We just never seemed to get round to it.)
(NOTE:- We dug the Yacon up in 2017 without actually ever sampling it. We just never seemed to get round to it.)
This is what Thompson and Morgan have to say about them:
Sweet-tasting tuber makes ‘no-sugar’ syrup suitable for diabetics Here’s an interesting tuber with the texture of water chestnuts and a sweet taste of pear with a hint of watermelon! Yacón is deliciously juicy, especially when freshly lifted and eaten raw – the word ‘yacón’ apparently means ‘water root’ in the Inca language and this turns out to be a very apt description. An exciting feature of this tuber which looks quite like a sweet potato, is that the liquid content from the tubers can be extracted using a juicer (or food processor – see Culinary Uses) and made into a super sweet syrup which can be used as a substitute for sugar, much like honey or maple syrup. And the best thing about the syrup, is that it’s virtually calorie-free! Yacón contains an indigestible sugar called inulin which means that yacón – the tubers AND the sweetening syrup – are suitable for diabetics.
How to make ‘sugar-free’ yacón syrup
Wash tubers thoroughly and whizz them in a food processor to make a pulp. Then boil the pulp in a large pan, using a cooking thermometer to keep the temperature at approximately 103°C, to form a dark brown syrup. Just four plants should provide the 12 kgs of tubers required to produce 1 litre of syrup.
Culinary uses of yacón
Fresh tubers can just be washed – no need to peel them if they are just out of the ground - and sliced to eat raw as a snack, in salads or added to stir fries. It should be noted that the flesh will tend to discolour – like apples and potatoes – so sprinkling with a little lemon juice (or apple juice) will slow this process down. When using yacón in salads, it’s best to toss it in lemon juice (or in lemon juice diluted with water) and add it just before dressing and serving. Don’t throw away the foliage from your yacón! A few fresh leaves from each plant can be cut during the summer and autumn, tied together and left to dry naturally in the kitchen or airing cupboard. Once dry, crumble them into boiling water to make a delicious ‘green tea’. Crumbled leaves will keep fresh for many months in an airtight container.
Yacón will absorb sauces, dressings and condiments so it can be used as a delicious and different ingredient in a variety of sweet and savoury salads. Try it with grated carrots and a grainy mustard vinaigrette as a colourful salad. Or chopped and added to a colourful fruit salad of pineapple, mango and pomegranate. Yacón can also be roasted along with other root vegetables, tossed in olive oil, sprinkled with sprigs of rosemary or simply steamed. The possibilities are endless.
Growing yacón
Yacón is easy to grow in most soils, although deeper soils will provide a heavier yield of larger tubers. Plants will greatly appreciate the addition of compost and/or well-rotted manure each autumn. The height of the plants makes them ideal companion plants for spinach, French beans, courgettes and radish plants to utilise space in between plants and to provide dappled shade.
Harvesting yacón
Using a long fork, carefully lift the tubers as they tend to bury quite deeply in the soil, and will form a clump similar to a dahlia. Carefully break off the tubers. Any damaged tubers should be used promptly or made into syrup as they will rot in storage. Only undamaged tubers will store.
Crop yields - An average plant will yield 3.5–4 kgs of tubers.
Storage
Tubers store extremely well in paper or hessian sacks in a cool dry place in the shed or garage, but they need to be kept frost free. They often sweeten over time. Keep a couple of yacón tubers in the fruit bowl where they will ‘warm up’ and sweeten further before use. Stored tubers will form a thicker skin which turns a darker brown colour and which will need peeling as the skin becomes more bitter over time.
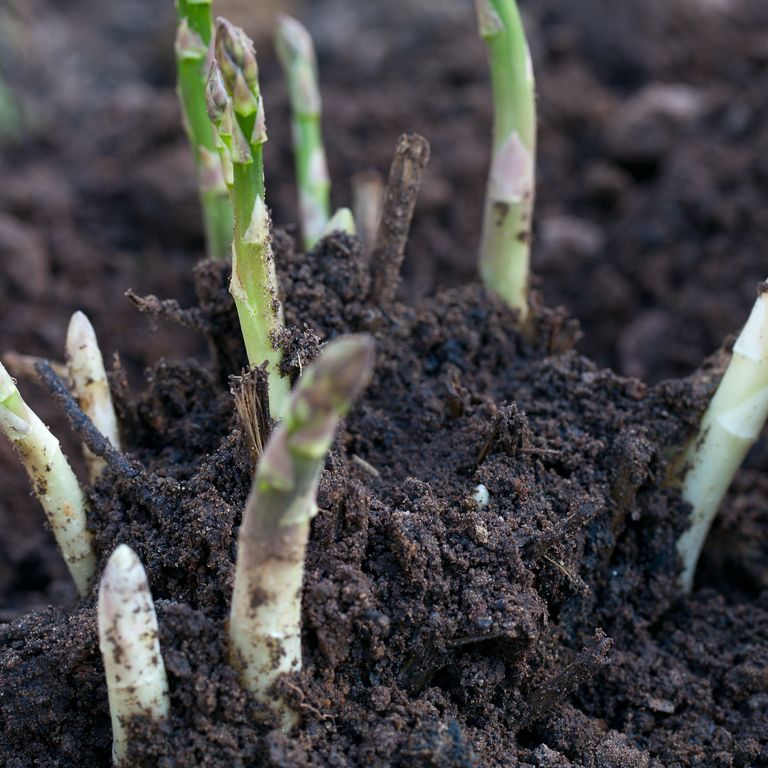
Asparagus.
There's a reason why many of us turn to asparagus in the spring and summer months: It's one of the first crops of spring harvest, and the fresh-picked spears are more tender and tasty during the growing season. Even more, this versatile green is rich in B vitamins, vitamin C, calcium, and iron, making it a healthy (and welcome) addition to any meal.
While the idea of growing asparagus may be overwhelming, it shouldn't be: Asparagus is a great starting point because it's one of the few perennial vegetables that'll grow fresh spears year after year with little space and effort. Even though it takes asparagus plants three years to fully mature, it'll be well worth it when you have a bounty of nutritious spears at your disposal.
Now, here's everything you need to know about growing asparagus, whether you start from seed or spear.
How to Grow Asparagus From SeedIt takes patience to start your asparagus patch from seed, but there are advantages to gain from the extra wait. Seed-grown plants don't suffer from transplant trauma like nursery-grown roots, and you can buy a whole packet of seed for the same price you'll pay for one asparagus crown. Most seed-grown asparagus plants eventually out-produce those started from roots.
In northern climates, start seedlings indoors in late February or early March. Sow single seeds in newspaper pots, place the pots in a sunny window, and use bottom heat to maintain the temperature of the mix in the pots at 77ºF. When the seeds sprout, lower the temperature to 60 to 70ºF. Once the danger of frost passes, plant the seedlings (which should be about 1 foot tall) 2 to 3 inches deep in a nursery bed.
When tiny flowers appear, observe them with a magnifying glass. Female flowers have well-developed, three-lobed pistils; male blossoms are larger and longer than female flowers. Weed out all female plants. The following spring, transplant the males to the permanent bed.
How to Plant AsparagusSelect and prepare your asparagus bed with care — this crop will occupy the same spot for 20 years or more. It can tolerate some shade, but full sun produces more vigorous plants and helps minimize disease. Asparagus does best in lighter soils that warm up quickly in spring and drain well; standing water will quickly rot the roots.
Prepare a planting bed for your asparagus —simple raised beds work best — that's about 4 feet wide by removing all perennial weeds and roots, and digging in aged manure or compost.
Asparagus plants are monoecious, which means each individual asparagus plant is either male or female. Some varieties of asparagus, such as Jersey Knight and Jersey Giant, produce all male or primarily male plants, so they’re more productive — male plants yield more harvestable shoots because they don’t have to invest energy in producing seeds. Stick to an all-male asparagus variety if high yield is your main goal.
How to Harvest Asparagus
Don’t harvest any asparagus spears during the first two years that plants are in the permanent bed because they need to put energy into establishing deep roots. During the third season, pick the spears over a four-week period, and by the fourth year, extend your harvest to eight weeks. In early spring, harvest spears every third day or so; as the weather warms, you might have to pick your asparagus twice a day to keep up with production.
To harvest, cut asparagus spears with a sharp knife or snap off the spears at, or right below, ground level with your fingers.